PyTorch Lecture 2:基础知识
PyTorch 的基础数据类型和简单运算。
首先导入torch库。
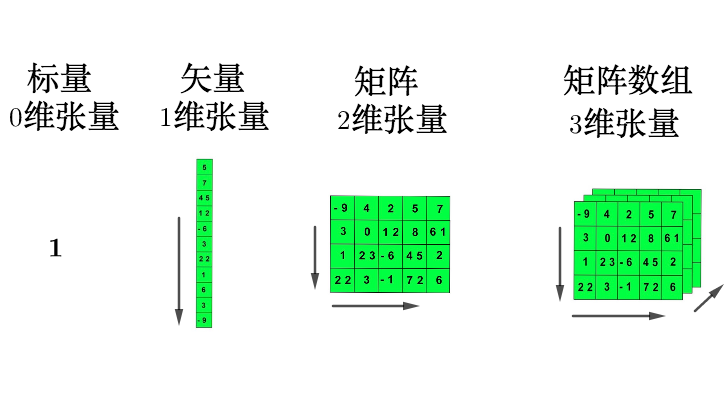
张量
张量(Tensor)可以理解为多维数组,它是 PyTorch 中的基本数据结构。
有关张量的创建、运算、数据处理等代码实现,可以参考GitHub 代码。
根据初始值创建张量
Python
# 创建 tensor,用 dtype 指定类型。注意类型要匹配
a = torch.tensor(1.0, dtype=torch.float)
b = torch.tensor(1, dtype=torch.long)
c = torch.tensor(1.0, dtype=torch.int8)
print(a, b, c)
根据随机值创建张量
Python
# 使用指定类型函数随机初始化指定大小的 tensor
d = torch.FloatTensor(2, 3)
e = torch.IntTensor(2)
f = torch.IntTensor([1, 2, 3, 4])  # 对于 Python 已经定义好的数据结构可以直接转换
print(d, "\n", e, "\n", f)
Python
tensor([[0.0, 0.0, 0.0], [0.0, 0.0, 0.0]])
tensor([1065353216, 0], dtype=torch.int32)
tensor([1, 2, 3, 4], dtype=torch.int32)
tensor和numpy array之间的相互转换
Python
import numpy as np

g = np.array([[1, 2, 3], [4, 5, 6]])
h = torch.tensor(g)
print(h)
i = torch.from_numpy(g)
print(i)
j = h.numpy()
print(j)
Text Only
tensor([[1, 2, 3],
        [4, 5, 6]], dtype=torch.int32)
tensor([[1, 2, 3],
        [4, 5, 6]], dtype=torch.int32)
[[1 2 3]
 [4 5 6]]
注意:torch.tensor创建得到的张量和原数据是不共享内存的,张量对应的变量是独立变量。而torch.from_numpy()和torch.as_tensor()从numpy array创建得到的张量和原数据是共享内存的,张量对应的变量不是独立变量,修改numpy array会导致对应tensor的改变。
常见的构造 Tensor 的函数
Python
k = torch.rand(2, 3)
l = torch.ones(2, 3)
m = torch.zeros(2, 3)
n = torch.arange(0, 10, 2)
print(k, "\n", l, "\n", m, "\n", n)
Python
tensor([[0.8086, 0.8206, 0.0462], [0.0070, 0.2045, 0.5737]])
tensor([[1.0, 1.0, 1.0], [1.0, 1.0, 1.0]])
tensor([[0.0, 0.0, 0.0], [0.0, 0.0, 0.0]])
tensor([0, 2, 4, 6, 8])
查看 tensor 的维度信息(两种方式)
tensor 的运算(加法)
tensor 的索引方式(与 NumPy 类似)
改变 tensor 形状的神器:view
Python
tensor([[1.8086, 1.8206], [1.0462, 1.0070], [1.2045, 1.5737]])
tensor([[1.8086, 1.8206], [1.0462, 1.0070], [1.2045, 1.5737]])
tensor 的广播机制(使用加法时要注意这个特性)
Python
p = torch.arange(1, 3).view(1, 2)
print(p)
q = torch.arange(1, 4).view(3, 1)
print(q)
print(p + q)
扩展和压缩 tensor 的维度:squeeze
例如,有一个张量是三维的,但其中的一维只有一个元素,可以通过squeeze进行降维,减小一个维度,但不会损失数据。
Python
tensor([[1.8086, 1.8206, 1.0462], [1.0070, 1.2045, 1.5737]])
torch.Size([2, 3])
tensor([[[1.8086, 1.8206, 1.0462]], [[1.0070, 1.2045, 1.5737]]])

torch.Size([2, 1, 3])
降维:
PyTorch 自动求导
这里将通过一个简单的函数 \(y=x_1+2*x_2\) 来说明 PyTorch 自动求导的过程。
Python
import torch

x1 = torch.tensor(1.0, requires_grad=True)
x2 = torch.tensor(2.0, requires_grad=True)
y = x1 + 2 * x2
print(y)
反向传播后看导数大小:
上述结果表明,偏导数分别是 1 和 2。
并行计算
优势:
- 计算速度快;
- 训练效果一般更好。